
"My Favorite March Ideas"
|
Thank you for your order of "My Favorite March Ideas & Activities." March is a fun month to think about spring things, Read Across America with Dr. Seuss, leprechauns and St. Patrick's Day. I have included activities for all of these to celebrate the coming of spring and to reinforce basic Kindergarten skills. I hope that you will find some of these to be your favorites, too. Please let me know if you have any questions. ****Please note that these files are optimized for Adobe Reader version 7 or newer. You may be unable to print correctly if you have an older version of this program. This program is free at the following link.
The Legend of the Lion and the Lamb
There is an old legend of the lion and the lamb. If the weather comes in on March 1st like a lion, then it is said to go out like a lamb. Or, if it comes in like a lamb, then it will go out like a lion!
Lion directions: 1. Copy the face and the ears for the lion on yellow construction paper and the eyes and nose on black construction paper. Most copiers can copy the black on black and you can see the black lines!
2. Glue face on the back side of the paper plate. The ears should stick up off the top of the plate. Orange or yellow yarn is twisted and glued around the face. I found it easier for students to put glue on the plate and then set the yarn on top of the glue with clean hands!
Lamb dir 1. Copy the lamb face, ears and eyes on black paper. Copy the nose pattern on pink paper. 2. Students cut out the parts and glue on the back side of a paper plate. The ears should stick up off the top of the plate. 3. Spread glue around the outside of the plate and set the cotton balls on top of the glue. 4. Staple a piece of yarn to the top of the paper plate. Put the two back sides of the paper plates together and staple all around the outside edges. Hang and enjoy the whole month of March!
Lion and Lamb Graph
I have given all of the pieces to complete the graph with the pieces, banner and the larger lion and the lamb. I like to make the top of the graph separate from the bottom portion to save for the next year! It saves a lot of time if you don't have to do the poster every year.
Tracking Lion and Lamb Days in March
During the month of March, we keep track of the weather with counting how many lion and how many lamb days we have. There are two choices in tracking the days in March: 1. You can use the March calendar and glue a lion or lamb in the squares for each day in March. If the weather is calm, you glue a lamb in the square for that day---stormy, rainy or bad weather is a lion day. This can be done as a whole class or each child can have their own calendar. 2. You can use the lion/lamb tally sheet and just make a tally mark next to the lion or lamb to keep track of the lion/lamb days with the whole class. Then at the end of the month, you can have each child complete the worksheet. This is a great time to talk about more and less--larger and smaller. *** Note The lion and lamb graph pieces are the same for the prediction graph above and the tracking of lion/lamb days.
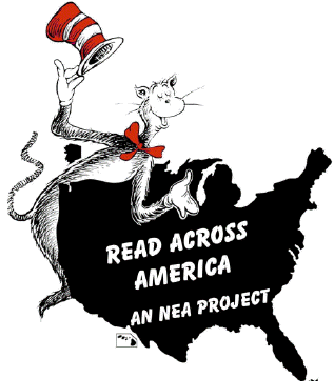
Celebrate Dr. Seuss' Birthday with Read Across America!
March 2nd is the official "Read Across America" Day to celebrate Dr. Seuss' birthday.
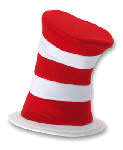
The hats are a bit difficult for children to make completely on their own. I had parents help with the difficult part!
4. Using the pattern below, cut a circle in the middle of a 10 inch paper plate. I used a heavy duty dinner size paper plate. An adult will need to cut the circle since it is heavy paper.
Cat in the Hat circle pattern PDF file
Copy the necktie pattern on red construction paper for each student. A very stretchy, large rubber band is stapled in the middle of the necktie. These neckties are cute to wear home with the hat.
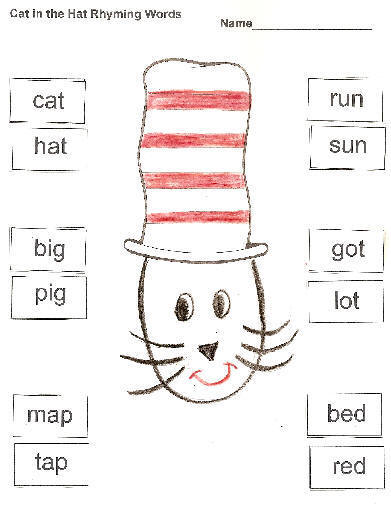
Cat in the Hat Rhyming Words
Each student will need a copy of the Rhyming Words with the Cat. They will need one half (cut vertically) of the second sheet with the matching rhyming words for matching. I try to conserve paper!! The students cut out all six of the words and match them with the rhyming words that are printed on the first page with the cat. I have students decorate the paper after they complete the cut and paste part of the worksheet. Cat in the Hat Worksheet PDF file
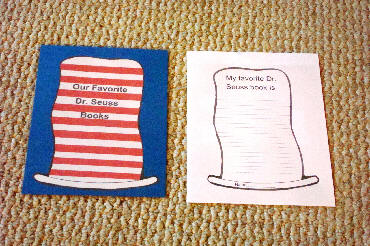
Our Favorite Dr. Seuss Books Writing Activity
For "Read Across America" we read lots of Dr. Seuss books. I also stress reading Dr. Seuss books at home for homework on this week. There is a letter provided for you to send home asking children to bring in books, videos, games, etc. to help celebrate Dr. Seuss' birthday. At the end of the week, we write a story telling which Dr. Seuss book is our favorite. There is a blank story writing paper provided with the book cover. You can cut out the stories around the hat and bind or staple all of them together with the book cover. I like to cut around the hats and mount them on colored construction paper and often use them on a bulletin board. After we take down the bulletin board, I bind or staple all of stories together for a class book. Dr. Seuss letter & Writing PDF file
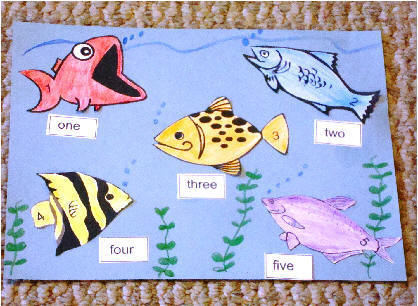
One Fish, Two Fish
Fish patterns can be copied on regular copy paper or white construction paper. You can direct students to color the fish any color or they can choose the colors for the fish. They might want to add decorations to the fish. We used light blue construction paper to look like the water. Students glue the fish on the blue paper. Students will need one set of the number words from one - five. There are three sets on each paper. Glue the number words to correspond to the correct number fish as shown in the sample above. After the number words are glued to the paper, students can decorate their paper with plants, etc.
Fish Pattern and Number Words PDF file
St. Patrick's Day Activities
Each year we make vests to celebrate St. Patrick's Day. Parents assisted in tracing the vests on white bulletin board type paper (butcher paper.) The vest does not have a back and is put on over the head. The pattern was too large for one piece of regular sized paper. I have given the pattern in three pieces. You will need to copy and follow the directions on each piece to piece together to make a template pattern. St. Patrick's Day Vest Pattern PDF file
Letter to Parents PDF file This is the letter to the parents asking for green decorations for the vests.
To make the vests we collected all kinds of interesting things. You might want to ask for parent volunteers to help the children glue the decorations on their vests. I always try to pick up things on sale at the dollar stores and party supply stores after St. Patrick's Day and save for the following year! Green Christmas garlands look great on the vests, too! We usually make the vests prior to St. Patrick's Day for the glue to dry and be ready to wear home on St. Patrick's Day. If you have adult help, you can also use a glue gun to attach some of the heavier things.
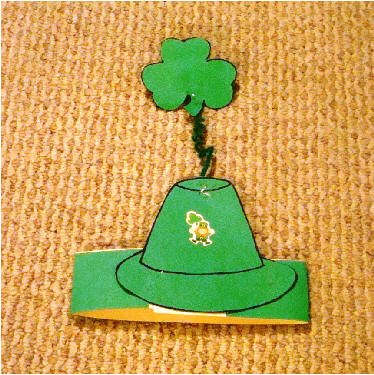
St. Patrick's Day Hats
Copy the hat and shamrock pattern on heavy green construction or cardstock. I used a sentence strip paper that is heavy poster type paper. The students cut out the hat and the shamrock. The shamrock was attached with tape and then stapled to a 12 inch chenille type pipe cleaner. The pipe cleaner was twisted or curled around a pencil, attached with tape and then stapled to the top of the hat. We added a St. Patrick's Day sticker to the middle of the hat. ***We attached a strip of green construction paper on the outside of the headband on the left, but this is optional.
Letter to Parents for green food
Two Leprechaun Letters PDF file
I buy the chocolate covered coins at Smart and Final to put in the pot. Or, plastic, gold coins are available at the party supply store. The kids love both, but are bit upset that the leprechaun didn't leave his REAL gold!
Another fun idea is to use pistachio pudding as "MAGIC DUST." When the pudding is mixed with milk, it turns green! Warning---most of the students didn't care for the taste of the pistachio pudding!
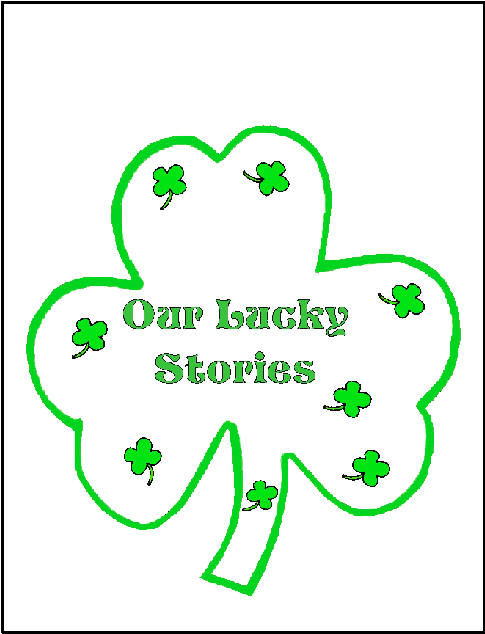
Leprechaun Stories
After reading different leprechaun stories, it is fun to practice writing skills with our own leprechaun trick stories. Blank story paper and graphics to put your students' face on the leprechaun is given. Photos can be taken and inserted into the face for these fun stories. These are great to save for end of the year memory books, too!
Make a Leprechaun Book
Lucky Charms Graph
Each child will need a copy of the Lucky Charms worksheet. We usually do this in a small group. I give each child about a ½ cup of cereal and they sort out the marshmallows. I allow them to eat the cereal! Then they color one square for each of the marshmallows they have in their cup. We talk about who has more or less of each of the different pieces, who has the most pieces of marshmallows, who has the least, etc. This is a fun activity for St. Patrick's Day!
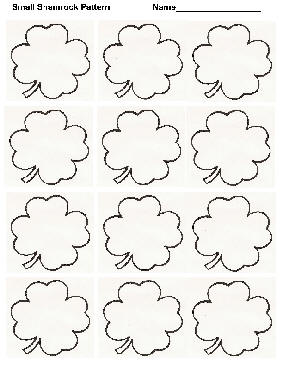
Shamrock Patterns
The patterned shamrocks can be done in several different ways: 1. Copy the small shamrocks on colored construction paper--green, yellow-green, orange and yellow. 2. Copy the small shamrocks on white paper and children color the shamrocks with crayons or colored pencils. The sample on the left was done with crayons. The colors are hard to see in the sample. 3. Children can cut around each shamrock. If the shamrocks are too difficult for your students, you might have them cut on the lines for each square.
Students write why they think they are lucky. The story can be dictated or students can use inventive spelling to finish the story. The story paper is cut out and can be mounted on green construction paper for an outside border. I used the stories for displaying on the bulletin board. There is a book cover provided that can be used to bind the stories into a class book. The kids always love reading all of the stories.
Lucky Story Writing Paper & Book Cover PDF file
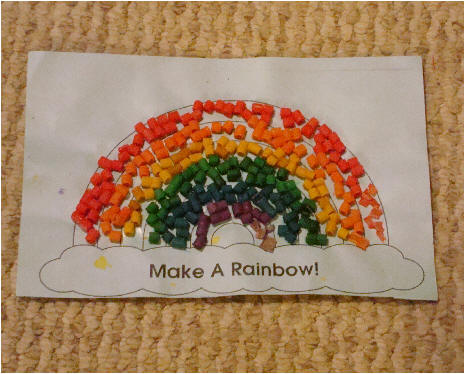
Make a Rainbow!
I copied the rainbow on light blue construction paper, but you can use white or any colored paper. The sample shown here was made using colored pieces of macaroni. I used the tiny pieces of macaroni. But, you can also use colored rice.
Dyeing Pasta or Rice
I
have found the Liquid Watercolor to be much easier
and produces more vibrant colors for dyeing all kinds
of different things: wood, pasta, rice, paper,
etc. No alcohol is needed. This
watercolor can be ordered from Discount School
Supply. It is also now available from Oriental
Trading Company. I think the prices are better
at Discount School Supply. It is much
cheaper to buy a set , but you can check the prices.
Click on the watercolor
set for a link to Discount School Supply. A
little bit of the watercolor goes a long ways!
The best thing about this dye is that you can put a
few drops of watercolor in a zip lock plastic bag,
add the pasta and shake. I let it dry for a few
minutes on a piece of newspaper. This
paint is great for lots of other projects and the kit
usually comes with ideas.
*** Note*** More red, yellow, and orange pasta is needed than the green, blue and purple.
Make a Rainbow
The leprechauns in the photo are a project taken from TLC (Teaching Little Children.) The leprechaun is included in the Spring book. You can view these books at: http://www.tlclessons.com/
The green pots (in the top photo) were purchased at a party store. I think they are easily found each year near St. Patrick's Day. It's a little difficult to tell from the top photo, but the coins are in the pots and the leprechauns are also holding some of the "gold" coins. For the pieces of gold (in the top photo) I took each child's photo and cropped it into a circle. Each photo was mounted on a piece of gold wrapping paper that was cut a bit larger than the photo to make an outside border.
Rainbow Fish
This project was completed in a small group.
2. Tissue paper was cut into approximately 1 inch square pieces. 3. Glue was thinned with a few drops of water and painted on the paper fish (we cut the fish out after completing the gluing of tissue paper.) I have the students put their fish on a piece of aluminum foil as they construct it. Pieces of tissue paper were placed on top of the construction paper fish. I encourage the students to use a paint brush to "paint" down any loose edges of the tissue paper. It is a big mess if they touch the glue and then try to handle the tissue paper! The aluminum foil can be easily moved to dry. 4. One aluminum foil square was given to each student to place wherever they choose to put the foil to make it a rainbow fish. 5. After the glue dries, the rainbow fish can be cut out. Bulletin Board hints: 1. I used tissue paper to make the seaweed on the bulletin board by taking whole, large pieces of tissue sheets and twisting them together into long coils. You can also use butcher paper for making the seaweed. The seaweed can be attached to the bulletin board with pins or carefully stapled. I cut the leaves out of tissue paper and stapled them on the board. 2. The water was made using aqua colored tissue paper. It was "bunched" up and stapled on the bulletin board. 3. To make the banner for the bulletin board, you will need to cut and piece the three sections together. I mounted the banner on sheets of blue construction paper and then laminated the banner. Rainbow Fish Pattern and Banner PDF file
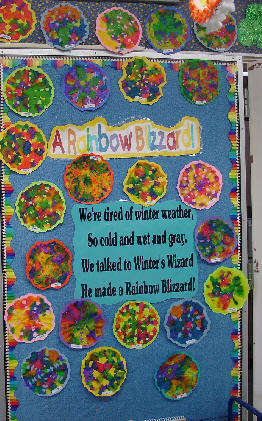
Rainbow Blizzard
The snowflakes were made using white, coffee filters. You can have each child cut their own snowflake, but it is a bit difficult. You might need to give some assistance, or have an older "reading buddy" help.
We used eye droppers with Coloration brand Liquid Watercolor for these snowflakes. I have listed where you can buy this brand of watercolor above with the Rainbow macaroni project. You can also use food coloring. I like the vibrant colors that you get using the Coloration Liquid Watercolor. But you might be able to use regular watercolor paint to get the same effect. The colors run together and make pretty kaleidoscope type patterns. After the snowflakes were dried, they were mounted on a contrasting color of construction paper. I cut around the outside of the snowflakes making a scalloped outside edge. The poem was enlarged from a regular sized 8 ½ x 11 piece of paper to poster size for our bulletin board. If your district doesn't have a poster making machine, you can have these made at some of the copy stores such as Kinko's or Staples. I have provided the poem in a PDF file for you to have enlarged. I also used the poem in small groups to teach tracking as we read the poem. It's also great for teaching phonemic awareness and memorization! Rainbow Blizzard Poem and Banner PDF file
Reading and Math Bingo
|
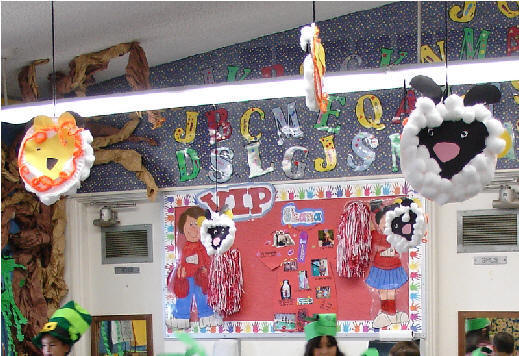
 The
lion and the lamb are both constructed on paper plates.
The plates are stapled together back-to-back and hung with a
yarn hanger. See photos.
The
lion and the lamb are both constructed on paper plates.
The plates are stapled together back-to-back and hung with a
yarn hanger. See photos.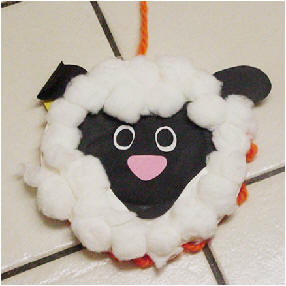 ections:
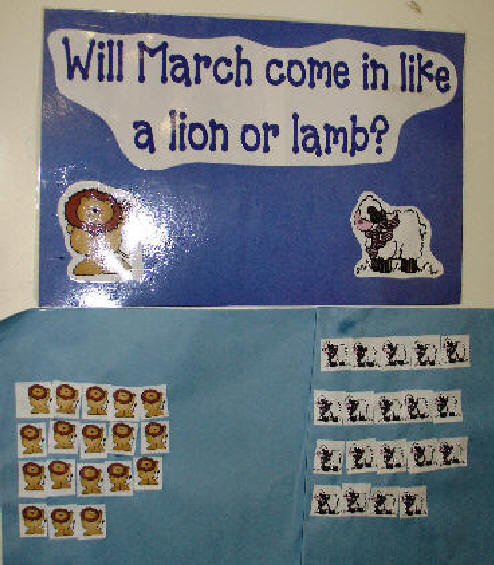 On
the last day of February, we do the lion and the lamb graph
to predict what kind of weather we will have the next day, March 1st.
If the student thinks that it will be a calm, nice day, they
will get a lamb to put on the graph. If they think that
the weather will be a stormy day, they choose the lion for
their vote.
On
the last day of February, we do the lion and the lamb graph
to predict what kind of weather we will have the next day, March 1st.
If the student thinks that it will be a calm, nice day, they
will get a lamb to put on the graph. If they think that
the weather will be a stormy day, they choose the lion for
their vote.

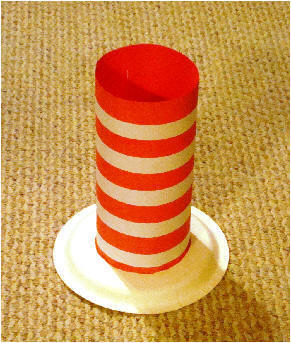
 1.
The top of the hat uses a 12 x 18 piece of red
construction. The strips of white construction
paper are cut into 1 x 18 inch pieces. The
students can glue these strips on the red paper.
1.
The top of the hat uses a 12 x 18 piece of red
construction. The strips of white construction
paper are cut into 1 x 18 inch pieces. The
students can glue these strips on the red paper.
 3.
Staple, tape or glue this paper into a tube shape.
I stapled the ends and then used tape to hold it.
Parents are great to help out with this part!
3.
Staple, tape or glue this paper into a tube shape.
I stapled the ends and then used tape to hold it.
Parents are great to help out with this part!
 5.
Cut tabs all around the red and white construction
paper and fit inside the circle of the paper plate as
shown in the photo. Tape the tabs down around
the circle.
5.
Cut tabs all around the red and white construction
paper and fit inside the circle of the paper plate as
shown in the photo. Tape the tabs down around
the circle.


 Part One---Cut one
of these on the fold.
Part One---Cut one
of these on the fold. Part Two---Cut two
of these pattern (one piece will need to be flipped
over when taping together)
Part Two---Cut two
of these pattern (one piece will need to be flipped
over when taping together) Part
Three---Cut one
of this pattern and overlap about two inches to part
2.
Part
Three---Cut one
of this pattern and overlap about two inches to part
2. 


 We
also celebrate the day with a green snack. I
have provided a letter to the parents to help with
contributions. It's amazing the
variety of green foods the children bring. It's
fun to see all of the GREEN!! I send the letter
home with the children a week or so before St.
Patrick's Day.
We
also celebrate the day with a green snack. I
have provided a letter to the parents to help with
contributions. It's amazing the
variety of green foods the children bring. It's
fun to see all of the GREEN!! I send the letter
home with the children a week or so before St.
Patrick's Day. On
the morning of St. Patrick's Day, we "pretend" that a
little leprechaun visited the classroom the night
before. He leaves a letter for the students
telling them that he has had fun playing overnight in
the classroom and has lost his shoes. The
letter tells the students that he will return with a
pot of gold if the students can help him find his
lost shoes. Before the students arrive, I "mess
up" the room by turning over chairs and putting
things out of place--crayons, books, etc. You
could also scatter shamrocks all around. I
hide the shoes in a fairly obvious place and post his letter in a place the
students will find. I put it on our daily
message board. After the students arrive, we
read the letter. Then they hunt for the shoes.
After we find the shoes, we write a letter to the
leprechaun telling him that we found his shoes and
ask for him to leave his pot of gold!
On
the morning of St. Patrick's Day, we "pretend" that a
little leprechaun visited the classroom the night
before. He leaves a letter for the students
telling them that he has had fun playing overnight in
the classroom and has lost his shoes. The
letter tells the students that he will return with a
pot of gold if the students can help him find his
lost shoes. Before the students arrive, I "mess
up" the room by turning over chairs and putting
things out of place--crayons, books, etc. You
could also scatter shamrocks all around. I
hide the shoes in a fairly obvious place and post his letter in a place the
students will find. I put it on our daily
message board. After the students arrive, we
read the letter. Then they hunt for the shoes.
After we find the shoes, we write a letter to the
leprechaun telling him that we found his shoes and
ask for him to leave his pot of gold! For
the "leprechaun shoes," I found a pair of toddler
type shoes at the local thrift store and spray
painted them GREEN and added some gold glitter.
Warning---the children get SUPER excited about
looking for the leprechaun and his shoes!! They
love looking and searching the room for the shoes.
They usually are looking for the leprechaun for many
days after St. Patrick's Day!
For
the "leprechaun shoes," I found a pair of toddler
type shoes at the local thrift store and spray
painted them GREEN and added some gold glitter.
Warning---the children get SUPER excited about
looking for the leprechaun and his shoes!! They
love looking and searching the room for the shoes.
They usually are looking for the leprechaun for many
days after St. Patrick's Day!  Sometime
during the day I replace the first letter with the
second letter. You might be able to do this at recess,
lunch or another time when the kids are out of the
room. Or, you might like to do it the following
day. I like to get all the excitement done in
one day!
Sometime
during the day I replace the first letter with the
second letter. You might be able to do this at recess,
lunch or another time when the kids are out of the
room. Or, you might like to do it the following
day. I like to get all the excitement done in
one day! 


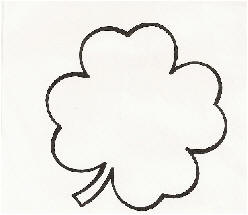 Two
different sizes of shamrocks are given. The
larger ones can be used to decorate bulletin boards,
art, etc. The small ones are great to copy on
different colors of paper and use for in making math
patterns. I used the math pattern strips in our
memory books.
Two
different sizes of shamrocks are given. The
larger ones can be used to decorate bulletin boards,
art, etc. The small ones are great to copy on
different colors of paper and use for in making math
patterns. I used the math pattern strips in our
memory books. 
 "I'm
Lucky" Story
"I'm
Lucky" Story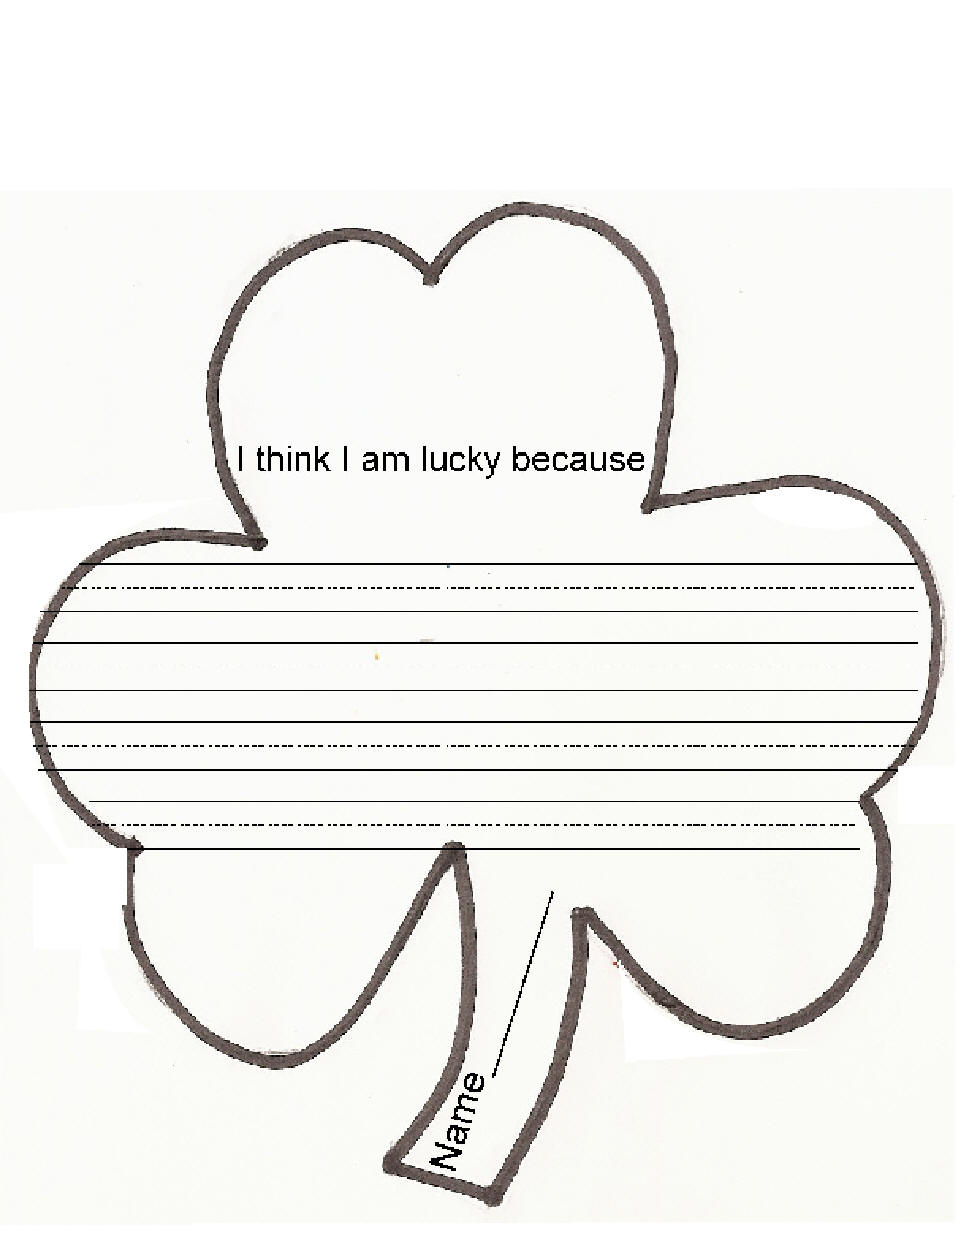

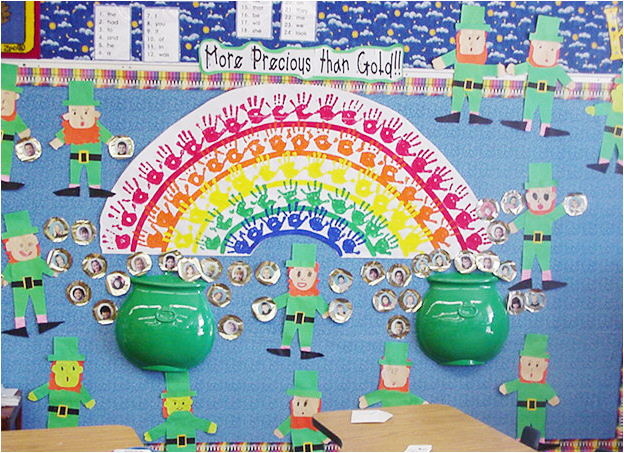
 This
is a closer view of the rainbow that we made for our
bulletin board using handprints. I used a very
large piece of bulletin board (butcher paper.)
I drew a light, pencil line for each band of the
rainbow as a guide to stamp the handprints with
tempera paint. After the rainbow was completed,
I cut it in three sections. I laminated the
rainbow in the three sections since my laminator was
not wide enough for the rainbow to fit. It also
made it easier to store the rainbow for future use.
This
is a closer view of the rainbow that we made for our
bulletin board using handprints. I used a very
large piece of bulletin board (butcher paper.)
I drew a light, pencil line for each band of the
rainbow as a guide to stamp the handprints with
tempera paint. After the rainbow was completed,
I cut it in three sections. I laminated the
rainbow in the three sections since my laminator was
not wide enough for the rainbow to fit. It also
made it easier to store the rainbow for future use.
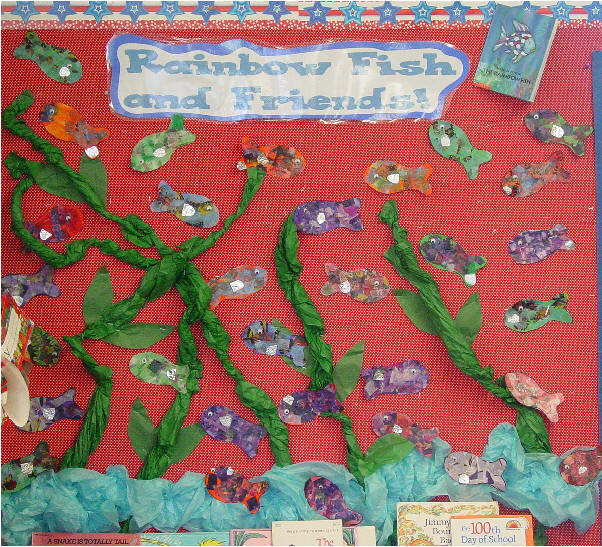 1.
Copy the rainbow fish pattern on white or colored
construction paper for each student.
1.
Copy the rainbow fish pattern on white or colored
construction paper for each student.
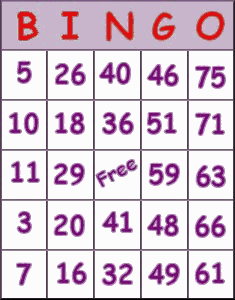
The Bingo card and pictures can be copied on regular copy paper. The children cut out the number or word squares and glue all of the pieces in random squares on the Bingo blank playing card (grid.) You will need a grid for playing the Math Bingo game and another grid to use for playing the Reading-High Frequency Bingo. Each child's card is unique since the squares are all placed randomly on the Bingo grid. This prevents too many winners at once!
I cut out a set of pictures to use for playing the game and put all of them in a little box to draw out when playing. You can call the number or give clues such as: the number after 12 is ____. I just call the words when playing Reading Bingo.
I have the students keep their Bingo cards in their cubby for playing when we have a few minutes throughout the month. If you don't have cubbies, you can collect the cards each time you play. I have found poker chips work well for placing on the squares. Or, you can cut small squares of construction type paper for the students to use for covering the squares. We usually give stickers or some small prize for the winners.
Math Bingo--- Number Recognition from 7-30. If you would like to change the numbers for practice, you can use the blank grid and write different numbers for practice.
Reading Bingo---I have used the first 25 words on the Dolch High Frequency Word list. However, your district might have a different list of words. You can use the blank grid to make your own list of words that you would like to practice. If you have students who are not ready for the high frequency words, you might want to use the blank Bingo grid for practicing alphabet recognition, consonant-vowel-consonant words (CVC words) such as cat, bed, fig, top, sun, etc. This is also great for extra practice on sounding out words and using phonetic skills!
Thanks again for your purchase. Please let me know if you have any questions.